 how-to
How to Install Professional Window Tint Step by Step
Quick Summary
Professional window tinting installation is a multi-stage job that involves preparing the glass and work area, measuring and cutting the film, applying it with slip solution, and squeegeeing out water and air. Choosing a film compatible with your glass and keeping the workspace dust-free are key to a clean result.
- Clean the glass with a mild, film-safe cleaner, since ammonia-based products can leave residue.
- Measure the window and add an inch or two of margin so the film can be trimmed to fit.
- Spray the glass with slip solution so you can reposition the film before it grabs.
- Squeegee from the center outward with firm, overlapping strokes to push out water and air.
- Inspect each window under raking light while the film is still wet, when fixes are easiest.
Table of Contents
- What Professional Window Tinting Installation Involves
- Tools and Materials You Need Before Starting
- Preparing the Vehicle, Room, and Glass
- Measuring, Cutting, and Shaping the Film
- Applying, Positioning, and Squeegeeing the Film
- How Long Window Tinting Takes From Start to Finish
- Caring for Your Tint After Installation
- Booking Your Installation With Signs and Window Tinting LLC
- Frequently Asked Questions
What Professional Window Tinting Installation Involves
Professional window tinting installation is a multi-stage job that takes skill, the right film, and a clean workspace.
A typical installation involves preparing the glass and work area, measuring and cutting the film, applying it, and squeegeeing out water and air.
Installation varies by application, including automotive, residential, and commercial windows.
- Automotive: Curved glass, tight channels, and defrost lines
- Residential: Larger flat panes and mixed window styles
- Commercial: Big glass areas, high or hard-to-reach windows, and scheduling around business hours
Tools and Materials You Need Before Starting
The film choice affects how the material handles and what the finished window does.
Core tool kit
- Spray bottle filled with slip solution (water with a few drops of baby shampoo or a dedicated film-installation concentrate)
- Squeegee, plus a hard card or scraper for tight corners
- Utility knife with fresh replacement blades
- Lint-free microfiber towels and paper towels
- Measuring tape and a marker or grease pencil
- Clean spray bottle of plain water for final rinsing
- Heat gun or shrink tool for curved automotive glass
- Edge trim tool or hard card wrapped in a microfiber cloth for tucking film into seals
Film types and how they change the job
Film construction can affect handling during installation and compatibility with the glass.
When selecting window film, consider whether it is compatible with the glass.
Workspace setup
Plan for a dust-free space. A garage bay with the door closed works well, and a damp floor helps settle loose dust before you start. Keep the film stored flat and clean until it is ready to cut, and lay out tools within reach so you are not walking across a wet floor mid-install.
Preparing the Vehicle, Room, and Glass
Next, clean the glass thoroughly. Use a glass cleaner and a microfiber towel, then wipe the inside and outside surfaces. Pay extra attention to the edges and corners, where grime collects.
Watch out: Ammonia-based cleaners can damage existing film and leave a residue that stops the new film from sticking. Stick to a mild, film-safe cleaner.
Careful preparation sets up a clean installation, and the key checks are summarised below.
| Step | What to do | Note |
|---|---|---|
| Clean the glass | Use a glass cleaner and a microfiber towel | Pay extra attention to edges and corners |
| Avoid harsh cleaners | Use a mild, film-safe cleaner | Ammonia-based cleaners can damage film and leave residue |
| Check film compatibility | Ask the installer before cutting | A film that suits car glass may not suit a commercial pane |
Measuring, Cutting, and Shaping the Film
Accurate measuring saves film and time. Measure the window's width and height, then add a small margin, usually an inch or two, so the film can be trimmed to the exact edge later.
Mark the cut line on the film's liner side, not the adhesive side. Use a utility knife with a fresh blade and cut on a clean, flat surface.
Curved glass, common on car side and rear windows, needs shaping. Installers often use heat to shrink the film so it follows the curve without wrinkles. This takes practice, so beginners should start on a flat test pane.
Keep these habits while cutting:
- Replace the blade often, since a dull blade tears the film
- Cut slowly for clean edges
- Check the fit against the glass before removing the liner
Applying, Positioning, and Squeegeeing the Film
This is where the job comes together. Work in a steady, unhurried rhythm, and treat each step as a checkpoint rather than a race to the edge.
Positioning the film
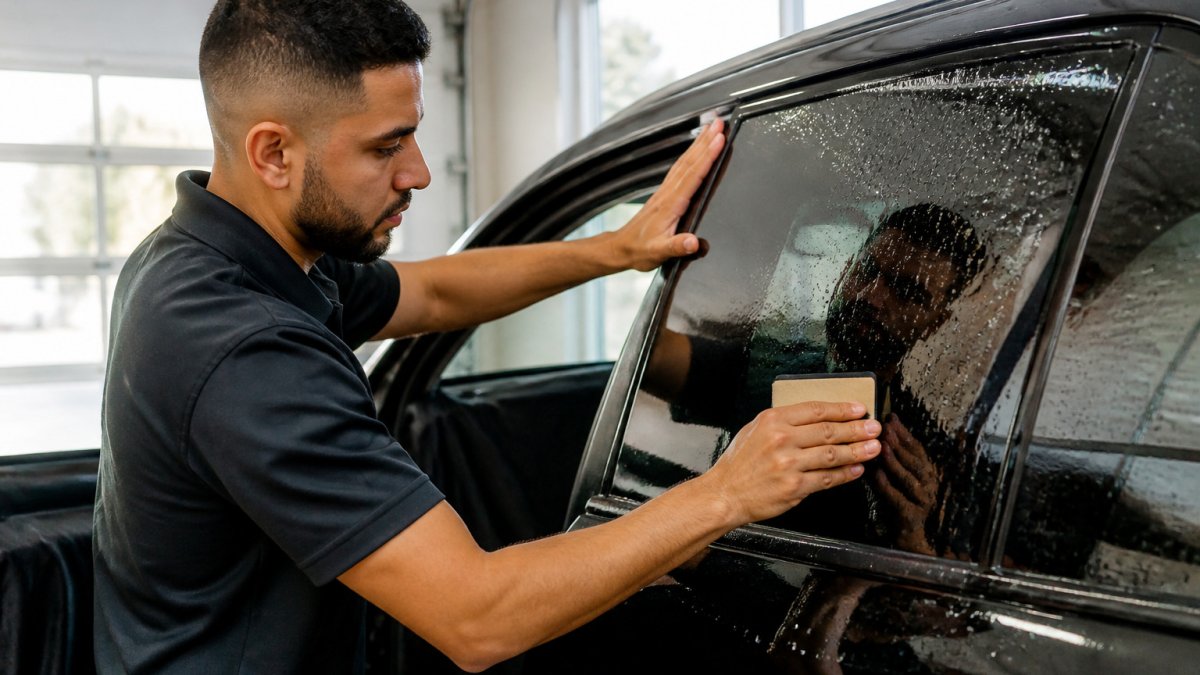
First, spray the glass generously with slip solution. The water lets you slide the film into place and reposition it before it grabs. Peel the liner away from the film slowly while keeping the adhesive side wet, then lay the film onto the glass, adhesive side against the glass, and let it settle. On automotive glass, many installers use a top-loading or reverse-roll technique so the film can be aligned at the top edge and rolled down into the channels; on flat architectural panes, a simple center-out placement is usually enough.
Squeegeeing out water and air
Squeegee from the center outward with firm, overlapping strokes, pushing water and air toward the edges. Work out bubbles as you go rather than letting them set. Trim the edges last: tuck the film into the seals or channels, and trim any excess with a fresh utility knife blade. A sharp blade and a steady hand give a clean, professional edge.
A common mistake is squeegeeing too hard too early. Pressing down before the water has spread can trap bubbles or create creases that do not fully disappear.
Troubleshooting: symptom to fix
-
Dust or specks under the film: Contamination from the workspace or the glass. Stop, lift the film only if it is still wet, and re-clean the glass and the film surface. Prevention is a damp floor, closed doors, and clean towels.
-
Fingers (triangular lifts at the edge): Caused by film stretching or by an edge that was not fully tucked. Re-tuck the edge while the film is still wet, or trim and re-seat it.
Quality-control checks before you call it done
How Long Window Tinting Takes From Start to Finish
Installation time depends on the job's size and complexity.
Caring for Your Tint After Installation
Small bubbles or hazy spots often disappear as the film cures. If problems remain after the curing period, call the installer rather than trying to fix them yourself.
Booking Your Installation With Signs and Window Tinting LLC
Signs and Window Tinting LLC offers window tinting for automotive, residential, and commercial clients. Auto Window Tinting in Grandville covers window tinting for vehicles.
To get started, schedule your project with us. Get a free quote on window tinting before you decide.
Frequently Asked Questions
How long does a professional window tinting installation take?
Installation time depends on the number of windows and the job's size and complexity. Ask for an estimated timeline when you request a quote.
What is the difference between DIY and professional window tinting?
Professional window tinting is an option for vehicle and home windows. Ask a provider about its installation process.
What tools do professional window tinters use?
Ask a provider which tools they use if you want to understand the process better.
How do I maintain window tint after professional installation?
For care instructions or concerns about the finished film, contact your installer.
Ready to move forward? Contact Signs and Window Tinting LLC to discuss your project and get a free quote.