 how-to
How to Prevent Window Tint Bubbling: A Complete Guide
Table of Contents
- What Causes Window Tint Bubbling
- Best Automotive Window Tinting Services and Installation Standards
- Proper Surface Preparation Before Installation
- Window Tint Curing Time and Post-Installation Care
- How to Remove Air Bubbles from Window Tint
- Climate-Specific Maintenance for Tint Longevity
- How to Prevent Window Tint Bubbling: A Visual Identification Guide
- Frequently Asked Questions
Last Updated: October 2, 2026
What Causes Window Tint Bubbling
Window tint bubbles form when air gets trapped between the film and glass, or when moisture pockets develop during curing. Poor surface preparation combined with rushing the curing time are the most common culprits.
Adhesive Failure and Film Delamination
Film delamination occurs when the adhesive layer loses its grip on the glass, causing the film to peel away permanently.
Moisture Pockets vs. Permanent Air Bubbles
Moisture pockets are temporary water droplets that disappear as the film cures, they appear cloudy and soft, vanishing within 2-4 weeks. Permanent air bubbles feel hard and crispy, appear as distinct circles, and indicate installation failure from poor surface preparation, missed squeegee spots, or film shift.
Environmental Factors: Heat and UV Exposure
Direct sunlight accelerates film degradation before adhesive fully cures. Days 1-3 are most critical, heat and UV exposure cause permanent damage. Days 4-14 continue curing; extreme temperatures slow the process. By weeks 3-4, adhesive reaches full strength but remains vulnerable to UV degradation. Hot climates shorten the curing window but create thermal stress; cold climates extend vulnerability.
Best Automotive Window Tinting Services and Installation Standards
Professional installation prevents most bubbling problems before they start. The difference between a quality installation and a poor one comes down to technique, film quality, and environmental control during application.
Why Professional Installation Prevents Bubbling
Professional installers control variables DIY applications cannot: climate-controlled environments, proper equipment, and proven sequences. Key differences include surface preparation time (15-20 minutes vs. 3-5 minutes), squeegee technique, premium film quality, environmental control (65-75°F and 40-60% humidity), and curing guidance. Signs and Window Tinting LLC uses premium films and proven techniques to prevent bubbling.
Film Quality and Longevity
Premium films last 8-10 years; budget films fail within 3-5 years. Premium films have durable, flexible adhesive and multi-layer UV protection. Budget films have thin, brittle adhesive and minimal UV protection. Premium film maintains flexibility across temperature ranges; budget film becomes rigid and loses adhesion.
Proper Surface Preparation Before Installation
Surface preparation is where most bubbles originate. Contaminated glass creates weak adhesion points where bubbles form months later.
Cleaning Techniques and Contaminant Removal
Professional cleaning removes dust, oils, and residue through: rough wash with microfiber cloth and soapy water, squeegee pass at 45-degree angle, 70% isopropyl alcohol wipe to remove oils (critical step most DIY installers skip), final inspection under bright light, and complete air drying. Avoid ammonia-based cleaners, they leave residue that blocks adhesion. Use ammonia-free solutions instead.
Gasket Cleaning and Static Electricity Control
Gaskets trap dirt and debris that falls onto glass when windows lower, creating adhesion weak spots. Wipe gaskets with a damp cloth before installation, paying special attention to the bottom gasket. Static electricity attracts dust particles to glass before film application. Control static with grounded equipment, 40-60% humidity, non-synthetic materials, and anti-static sprays in dry climates.
Window Tint Curing Time and Post-Installation Care
The curing process determines whether your tint stays bubble-free for years or fails within months. Most failures happen during the first 30 days because people don't understand what "curing" actually means.
The Critical Curing Process
Curing is the chemical bonding of adhesive to glass, taking 3-4 weeks to reach full strength. Days 1-3: adhesive molecules align; film appears hazy from residual moisture. Days 4-14: moisture escapes; haze gradually clears. Days 15-30: adhesive reaches 90% strength; moisture pockets disappear. Day 30+: full strength achieved.
Avoiding Window Operation During Curing
Operating windows during curing creates physical stress that separates film from glass before adhesive hardens. Don't operate windows for at least 3 days (7 days in cold weather, 14 days below 50°F). Each window operation flexes the glass and film, breaking delicate adhesive bonds at edges and creating conditions for bubbles.
How to Remove Air Bubbles from Window Tint
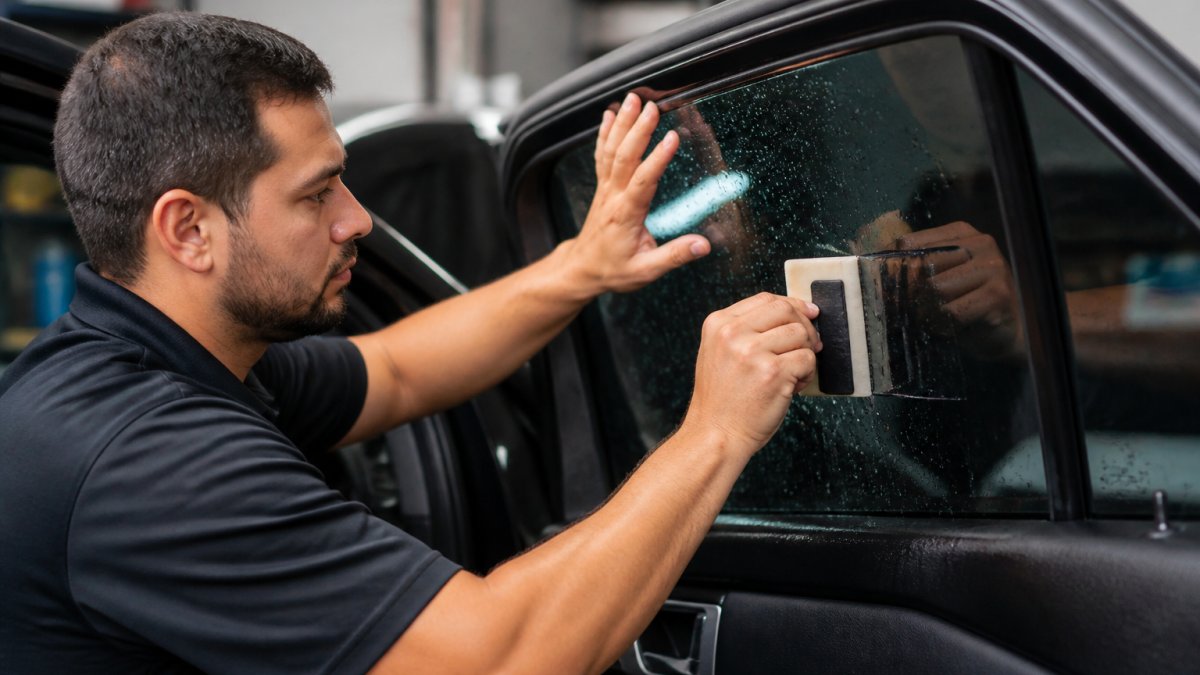
If bubbles have already formed, you have two options: DIY removal for small temporary bubbles, or professional repair for permanent failures.
DIY vs. Professional Repair Threshold
Small moisture bubbles (under 1 inch) that appeared during the first 2 weeks can sometimes be removed with a heat gun and squeegee. Anything larger, or any bubble that appeared after 4 weeks, needs professional repair.
When to attempt DIY removal:
- Bubble is smaller than 1 inch across
- Bubble appeared within the first 14 days
- The film is still properly adhered around the bubble edges
- You have a heat gun and a soft squeegee
When to call a professional:
- Bubble is larger than 1 inch
- Bubble appeared after the first month
- The film is peeling or delaminating around the bubble
- The glass has multiple bubbles (indicates installation failure)
- You're uncertain about the cause
Tools and Techniques for Bubble Removal
For small moisture bubbles only:
- Heat the bubble: Use a heat gun on low setting (around 140°F). Hold it 6 inches from the glass and move it in circles for 30 seconds. Don't concentrate heat in one spot, you'll damage the adhesive.
- Apply pressure: Use a soft squeegee or plastic card to gently push the bubble toward the nearest window edge. Don't press hard, use steady, gentle pressure.
- Push moisture out: Guide the moisture toward the edge where it can escape. This usually takes 2-3 minutes of gentle pressure.
- Cool and check: Let the glass cool. The bubble should be gone or significantly smaller.
If the bubble returns within a few days, the moisture is trapped deeper and won't respond to heat gun treatment. Professional removal is your only option.
Climate-Specific Maintenance for Tint Longevity
Window tint durability depends heavily on climate. Hot, sunny regions stress the film differently than cold, humid climates. Your maintenance approach should match your environment.
Heat Dissipation and Direct Sunlight Protection
In hot climates, UV exposure and thermal stress are the primary threats to tint longevity. The adhesive becomes more brittle as it ages under constant heat and UV bombardment.
Maintenance strategies for hot climates:
- Park in shade when possible: Direct sunlight ages film 2-3 times faster than shaded conditions.
- Use window shades or covers: Additional UV blocking extends film life significantly.
- Avoid extreme temperature swings: Don't park in the sun then immediately blast air conditioning. Thermal stress weakens adhesion.
- Clean with ammonia-free solutions: Heat makes adhesive more vulnerable to chemical damage from harsh cleaners.
- Inspect edges monthly: Hot climates cause edge peeling before other failures. Catch it early.
Seasonal Care and Ammonia-Free Cleaning Solutions
Window tint maintenance is simple but consistent. Use the right cleaning products and avoid physical stress on the film.
Proper maintenance routine:
- Clean every 2-4 weeks: Use ammonia-free glass cleaner and soft microfiber cloths only.
- Never use harsh chemicals: Ammonia, acetone, and strong solvents break down adhesive over time.
- Avoid abrasive materials: Paper towels, rough cloths, and scouring pads scratch the film surface.
- Don't use pressure washers: High-pressure water forces moisture under the film edges.
- Inspect edges quarterly: Look for peeling or separation. Address it immediately before it spreads.
How to Prevent Window Tint Bubbling: A Visual Identification Guide
Understanding what you're looking at helps you distinguish between problems that will resolve and ones that need professional attention.
Spotting Temporary Moisture vs. Permanent Damage
Temporary moisture bubbles:
- Appear cloudy or hazy (not crystal clear)
- Soft to the touch (not hard or crispy)
- Form during the first 2-3 weeks after installation
- Gradually disappear as curing completes
- Usually small (under 1 inch across)
- Distributed randomly across the window
Permanent air bubbles:
- Appear as distinct, defined circles
- Feel hard and crispy when pressed gently
- Don't change in size or appearance over weeks
- Often concentrated near edges or corners
- Typically larger (1-3 inches across)
- May be accompanied by peeling film edges
Delamination (film separating from glass):
- Film pulls away visibly from the glass edge
- Creates a visible gap you can see light through
- Starts at corners or edges and spreads inward
- Cannot be fixed with heat or pressure
- Requires complete film replacement
The timing is your biggest clue. If the bubble appeared in week one, it's almost certainly temporary moisture. If it appeared in week four or later, it's a permanent adhesion failure.
| Problem | Cause | Prevention |
|---|---|---|
| Moisture bubbles | Water trapped during installation | Allow proper curing time (3-4 weeks) |
| Permanent air bubbles | Poor surface preparation or film shift | Professional cleaning and proper squeegee technique |
| Edge peeling | Thermal stress or contaminant at edge | Quality film and gasket cleaning |
| Film delamination | Low-quality adhesive or UV degradation | Use premium film with strong adhesive |
| Haze that won't clear | Contamination or poor film quality | Professional installation with ammonia-free cleaning |
| Timeframe | What's Normal | What's a Problem |
|---|---|---|
| Days 1-7 | Haze and small moisture pockets | Large bubbles or peeling edges |
| Days 8-14 | Gradual haze reduction | Bubbles not improving or getting larger |
| Days 15-30 | Clear film with no visible moisture | Persistent haze or new bubbles appearing |
| Day 30+ | Crystal clear, fully cured | Any bubbles or peeling (needs repair) |
Frequently Asked Questions
Is it normal for window tint to have tiny bubbles right after installation?
Yes, small moisture bubbles are normal immediately after installation and during the curing process. These temporary bubbles typically disappear within 2-4 weeks as the adhesive sets and moisture evaporates. However, large air bubbles or bubbles that persist beyond the curing time indicate adhesive failure or improper installation. Monitor your tint closely; if bubbles remain after the full curing period, contact a professional to assess whether the film needs repair or replacement.
How long does window tint curing time take, and what should I avoid during this period?
Window tint curing time typically ranges from 3 to 7 days for side windows and up to 30 days for rear windshields, depending on film type and climate conditions. During curing, avoid rolling windows down, cleaning the tinted surface, or exposing the vehicle to direct sunlight when possible. Moisture can become trapped under the film during the curing process, creating temporary bubbles that will dissipate once curing is complete. Following these precautions ensures proper adhesive bonding and prevents permanent damage.
Can bubbling window tint be fixed, or does it need to be replaced?
Small, temporary moisture bubbles can often be fixed by allowing additional curing time or using professional heat gun techniques to redistribute moisture. However, if bubbles are caused by adhesive failure, film delamination, or contaminants trapped during installation, the tint typically requires replacement. Professional assessment is essential to determine whether repair is possible or if the film must be removed and reinstalled. Attempting DIY fixes on permanent damage can worsen the problem and compromise the film's protective properties.
Does cheap window tint bubble faster than premium film?
Yes, lower-quality window tint is more prone to bubbling and peeling because it uses inferior adhesive formulations and thinner film materials. Premium films feature better adhesive compounds designed for long-term durability and heat dissipation, reducing the likelihood of adhesive breakdown and delamination. Quality film also resists UV exposure more effectively, maintaining its integrity over years of direct sunlight exposure. Investing in quality tint from reputable providers ensures better longevity and fewer bubble-related issues throughout the film's lifespan.